


•Spread thin set on floor with the appropriate notched trowel.
•Place the first tile on the thin set bed.
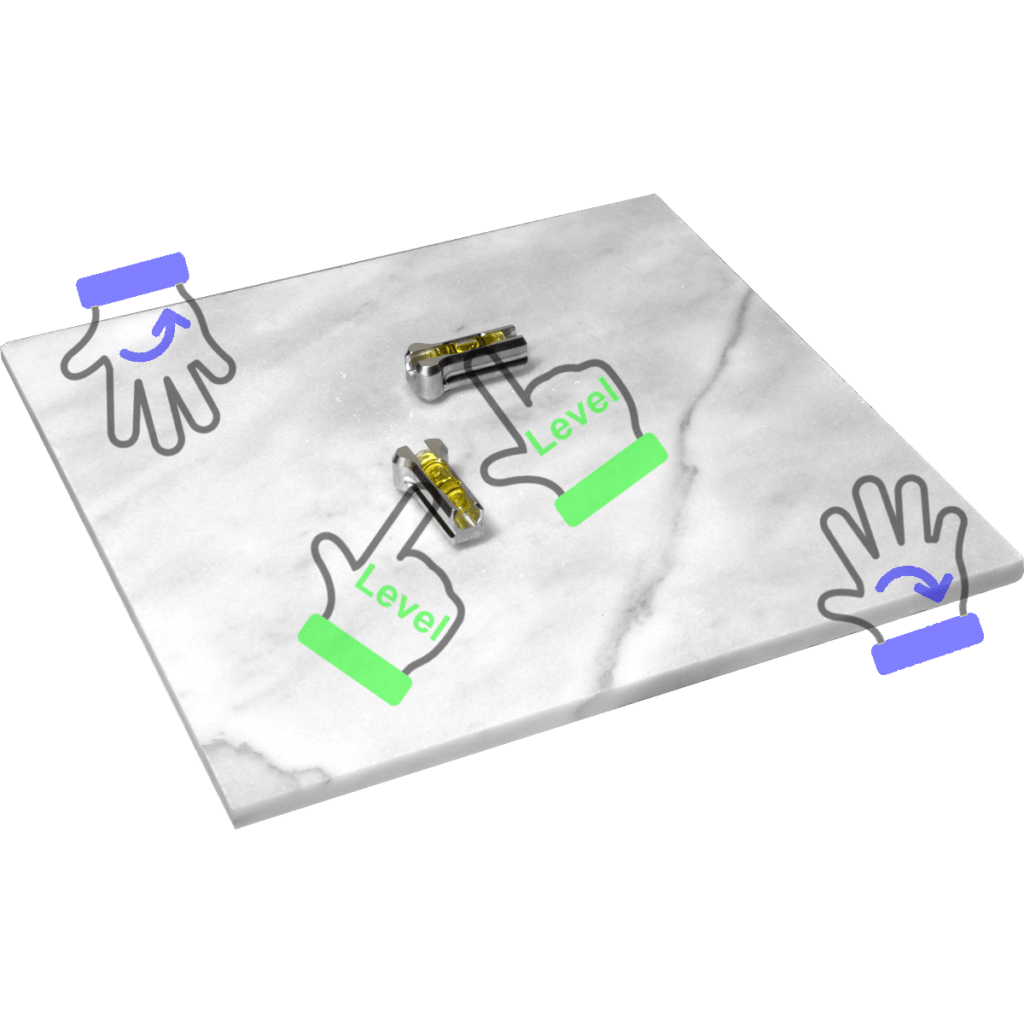
•Place 2 Tile Lippage levels on tile at right angles to each other.![]() •Work tile down into thin set to ensure proper contact.
•Work tile down into thin set to ensure proper contact.![]() •Keep working tile down until both levels read level.
•Keep working tile down until both levels read level.
![]() •Place the next tile on the thin set bed.
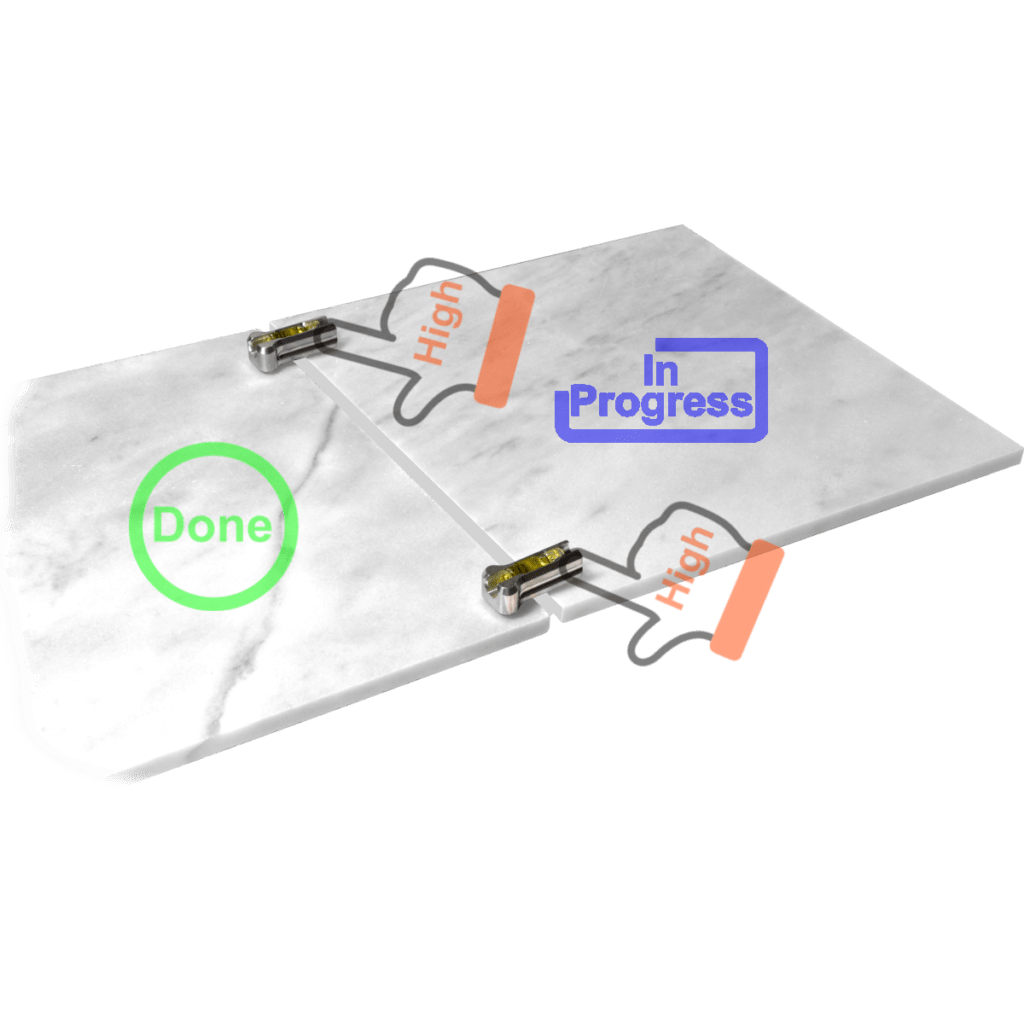
•Place the next tile on the thin set bed.![]() •Place 2 Tile Lippage levels over the grout joint of adjoining tiles towards the edges.
•Place 2 Tile Lippage levels over the grout joint of adjoining tiles towards the edges.![]() •The levels should read high on the tile just set (in progress tile).
•The levels should read high on the tile just set (in progress tile).
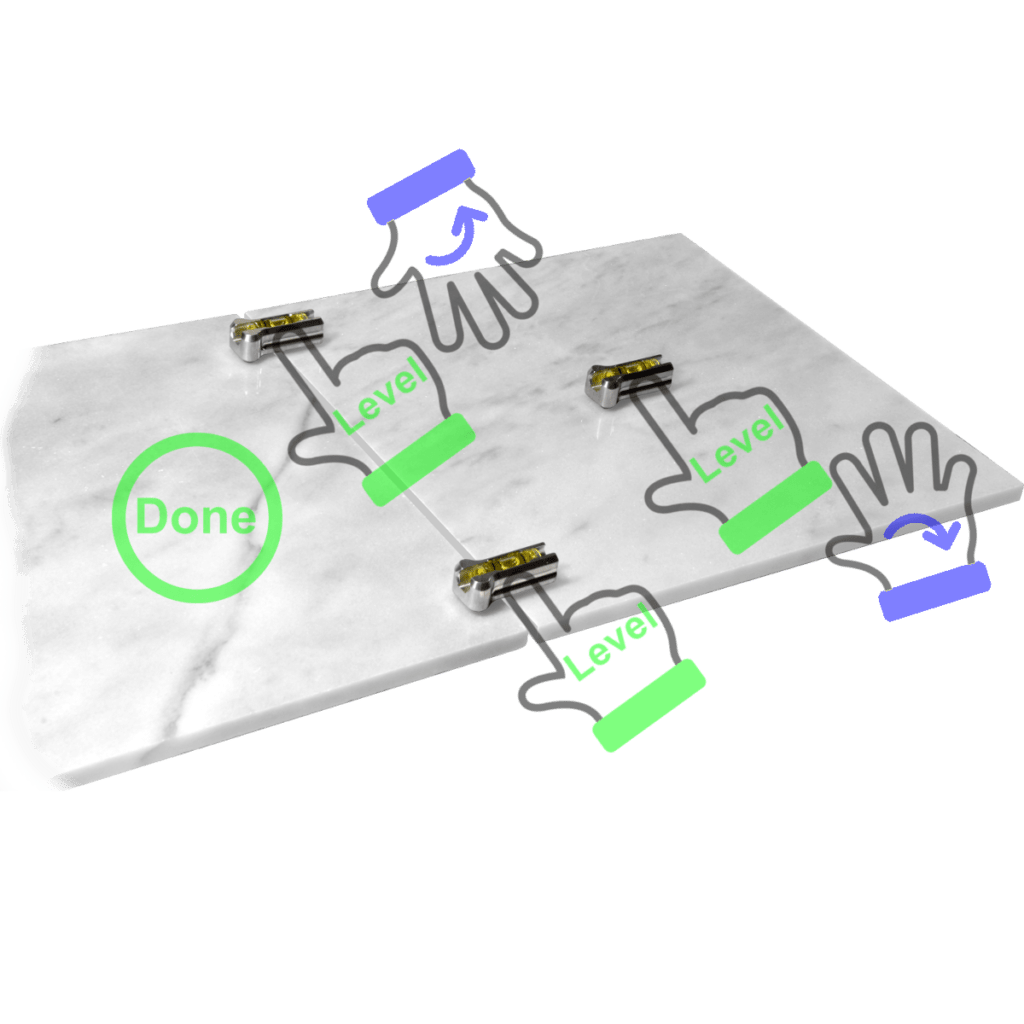
•Place a third Tile Lippage level on tile just set, the level reading should be the same direction as the other levels.![]() •Work tile down into thin set.
•Work tile down into thin set.![]() •Keep working tile down until all three levels read level.
•Keep working tile down until all three levels read level.
•The 2 levels over the grout joint indicate that the tiles are flush, no lippage or trippers, the 3rd level holds the tile level in the other direction.
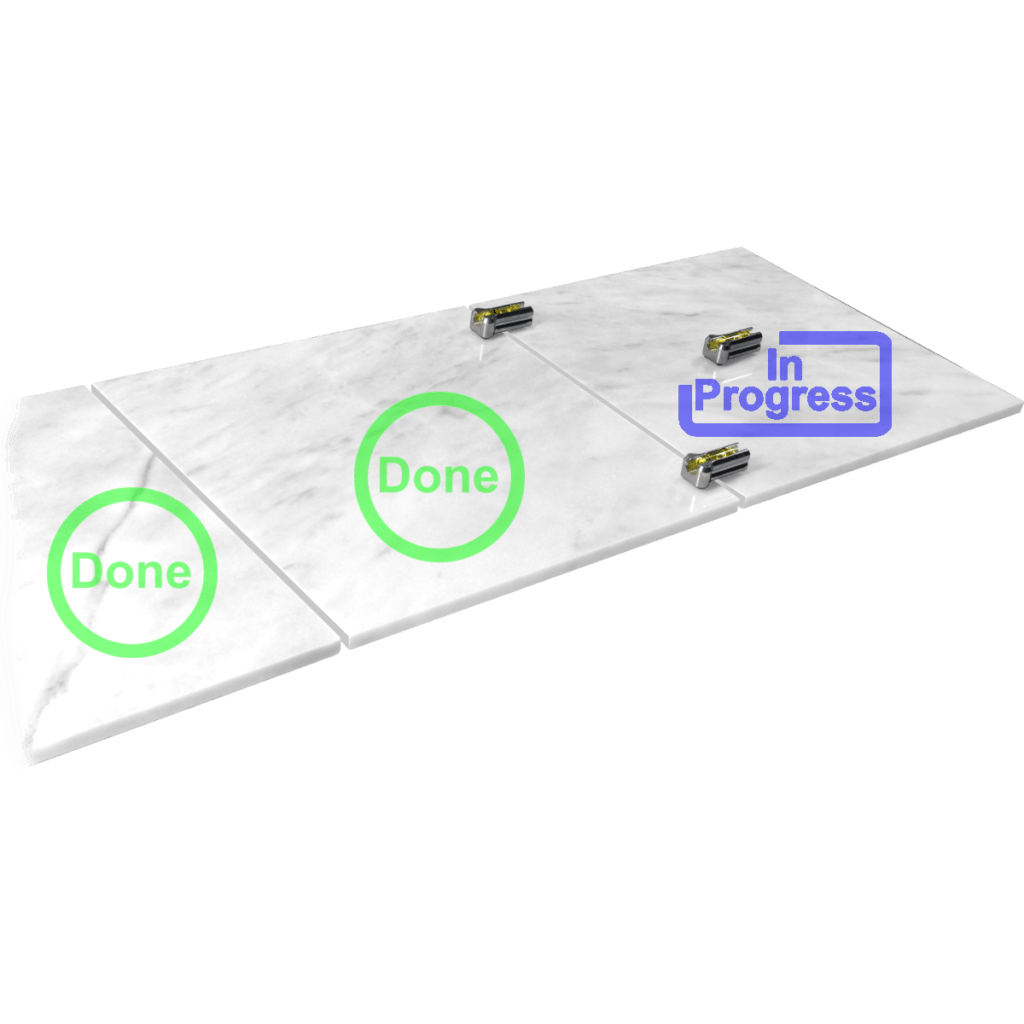
•You now have 2 tiles set in a row.![]() •Repeat steps 2 and 3 to finish this row.
•Repeat steps 2 and 3 to finish this row.![]()
![]() •You do not need to finish this row to continue with this system it will depend on your tiling preference.
•You do not need to finish this row to continue with this system it will depend on your tiling preference.
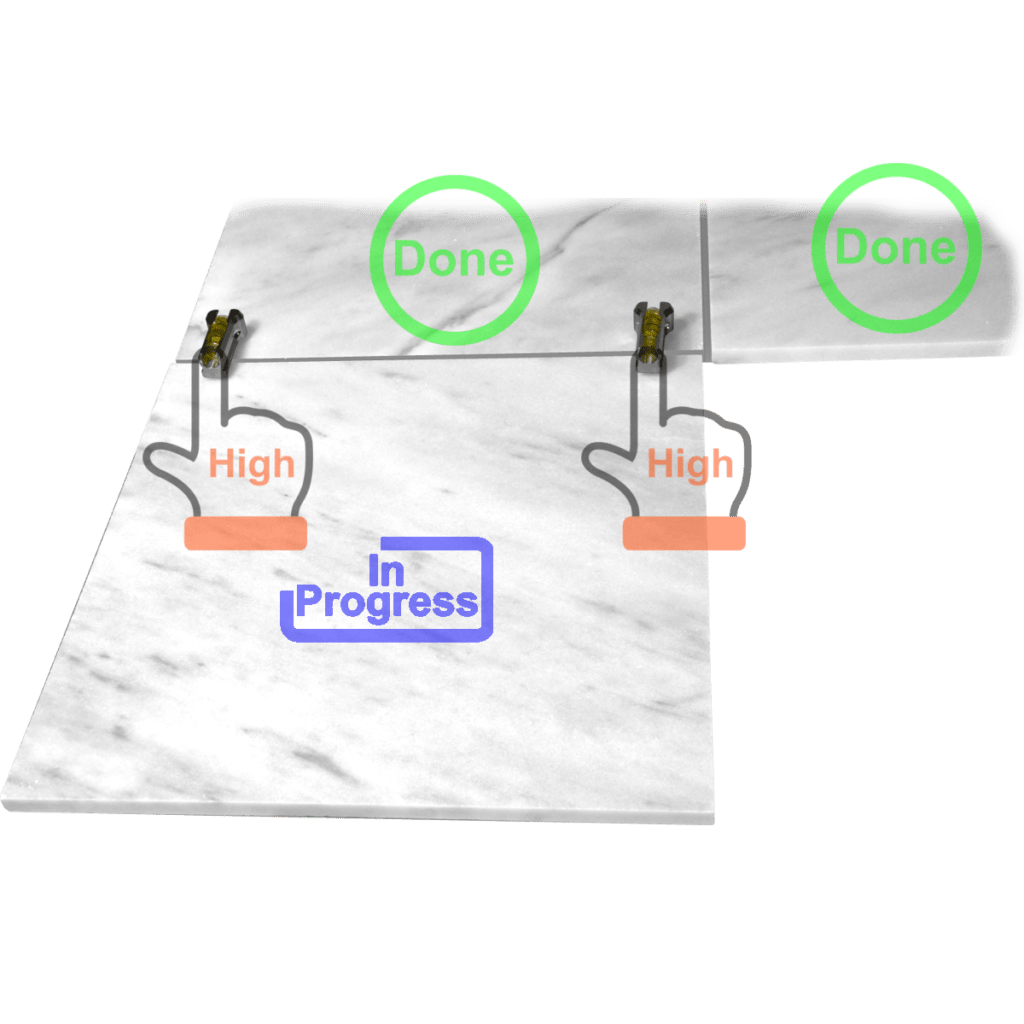
•This will be the same as step 2 and 3 only 90 degrees to first row set.![]() •Place next tile in front of done row.
•Place next tile in front of done row.![]() •Place 2 Tile Lippage levels over the grout joint of adjoining tiles towards the edges.
•Place 2 Tile Lippage levels over the grout joint of adjoining tiles towards the edges.![]() •The levels should read high on the tile just set (in progress tile).
•The levels should read high on the tile just set (in progress tile).
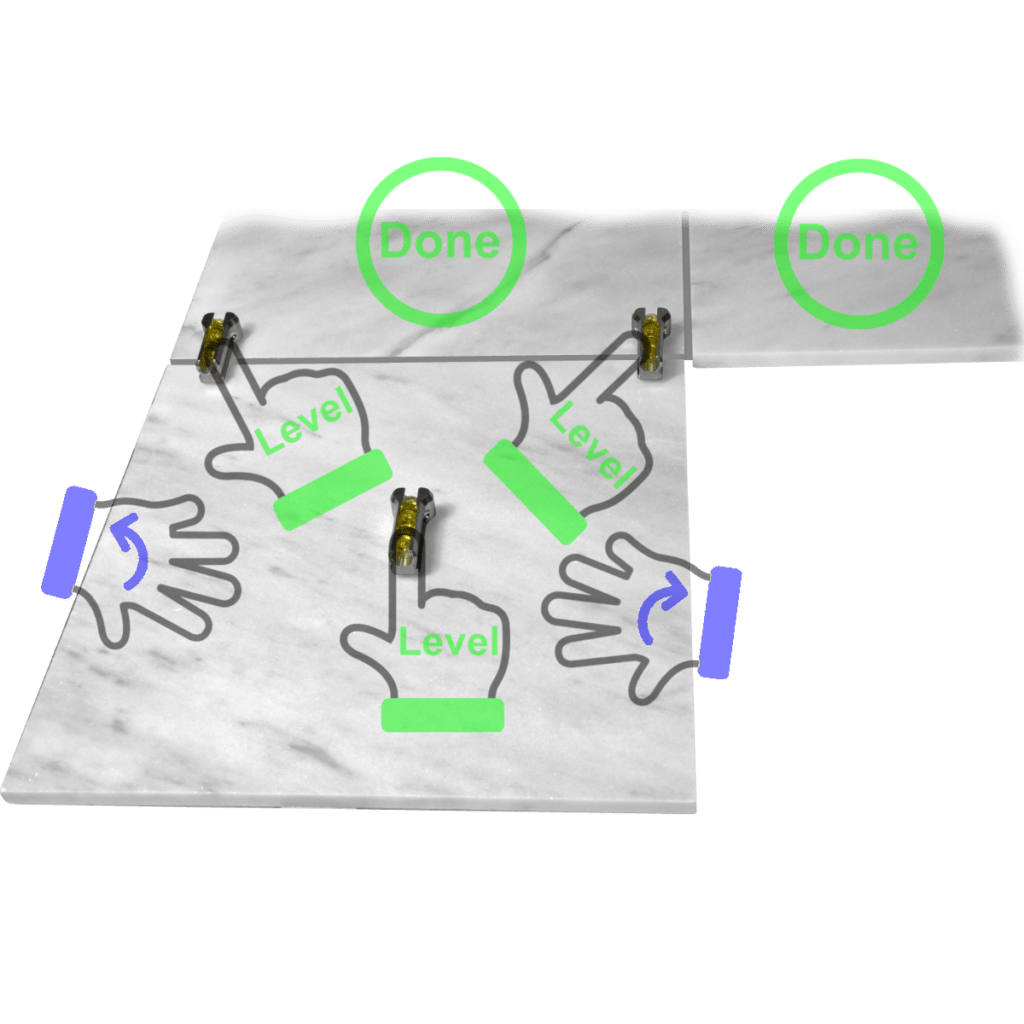
•Place a third Tile Lippage level on tile just set, the level reading should be the same direction as the other levels.![]() •Work tile down into thin set.
•Work tile down into thin set.![]() •Keep working tile down until all three levels read level.
•Keep working tile down until all three levels read level.
•The 2 levels over the grout joint indicate that the tiles are flush, no lippage or trippers, the 3rd level holds the tile level in the other direction.
•With two directions started the leveling process will change.
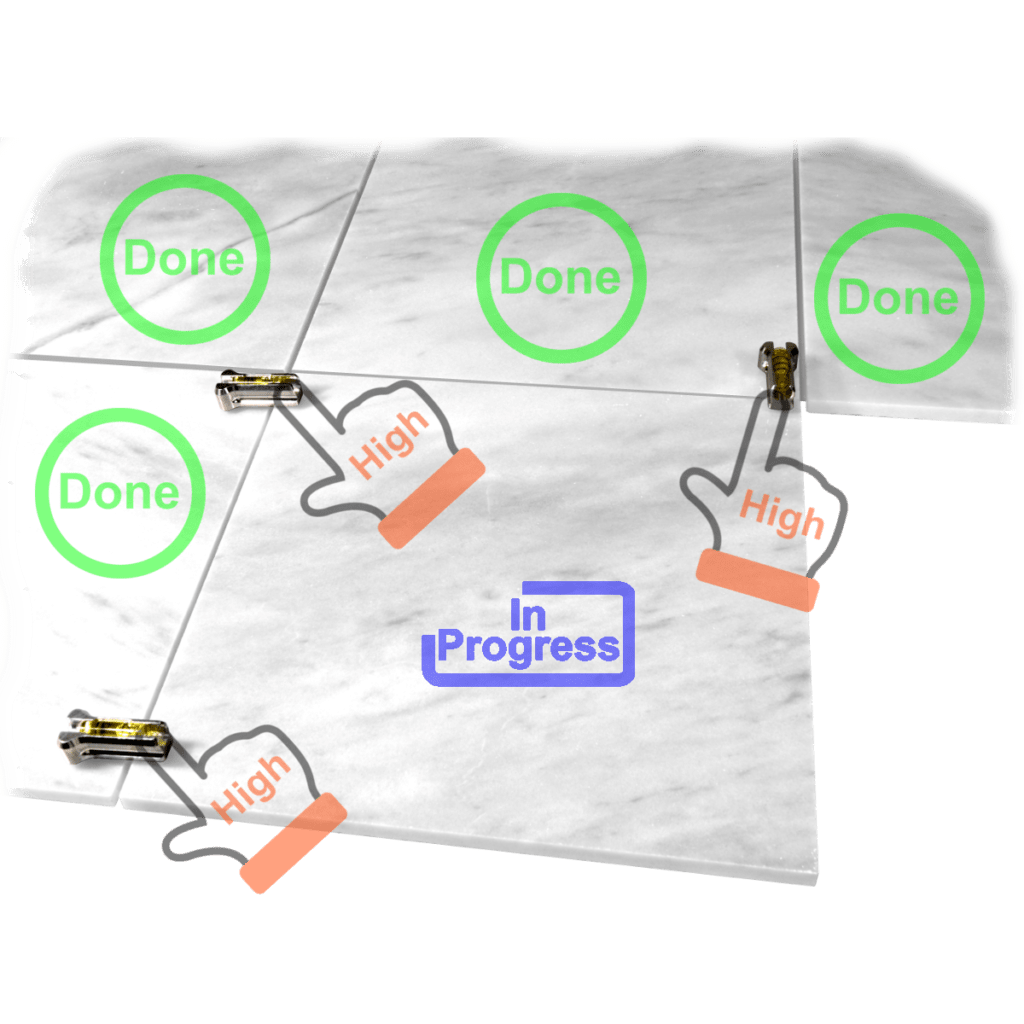
•You now have a corner formed of done tiles.![]() •Place next tile in the corner with 2 edges adjacent to done tiles.
•Place next tile in the corner with 2 edges adjacent to done tiles.![]()
![]() •Place 3 Tile Lippage levels over the grout joints of adjoining tiles in 3 opposite corners.
•Place 3 Tile Lippage levels over the grout joints of adjoining tiles in 3 opposite corners.![]() •The levels should read high on the tile just set (in progress tile).
•The levels should read high on the tile just set (in progress tile).
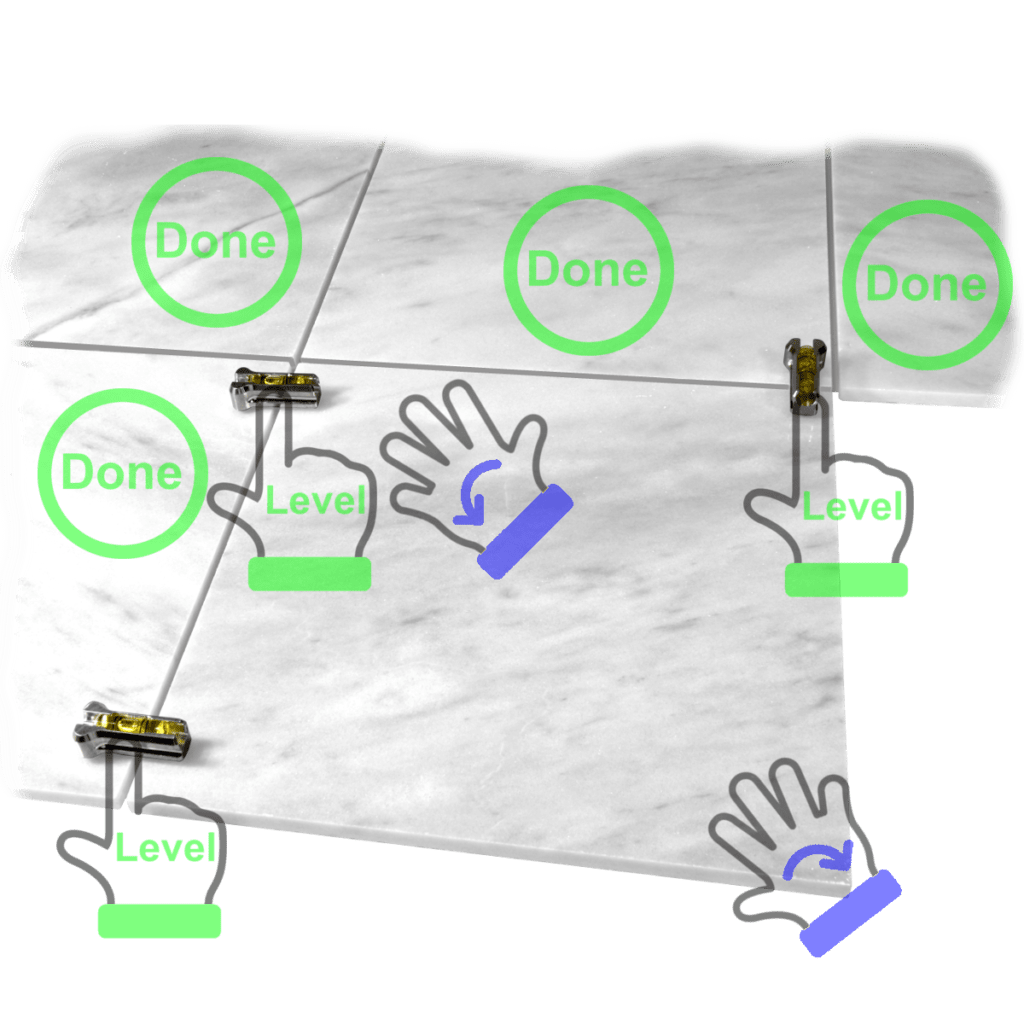
![]() •Work tile down into thin set
•Work tile down into thin set![]() •Keep working tile down until all three levels read level.
•Keep working tile down until all three levels read level.
•The 3 levels over the grout joints indicate that the tiles are flush, no lippage or trippers, in both direction.
•The 3 points will hold the tile level in both directions.![]() •You can now tile the remaining floor using the methods outlined.
•You can now tile the remaining floor using the methods outlined.
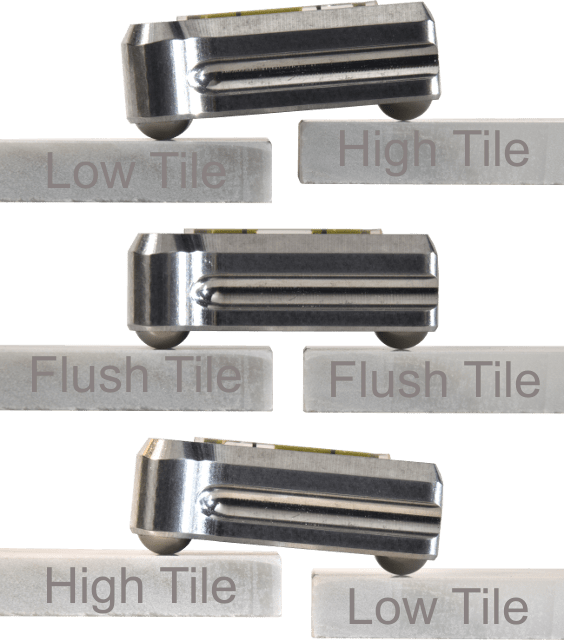
•The illustration above shows approximately where a bubble will read at different heights.
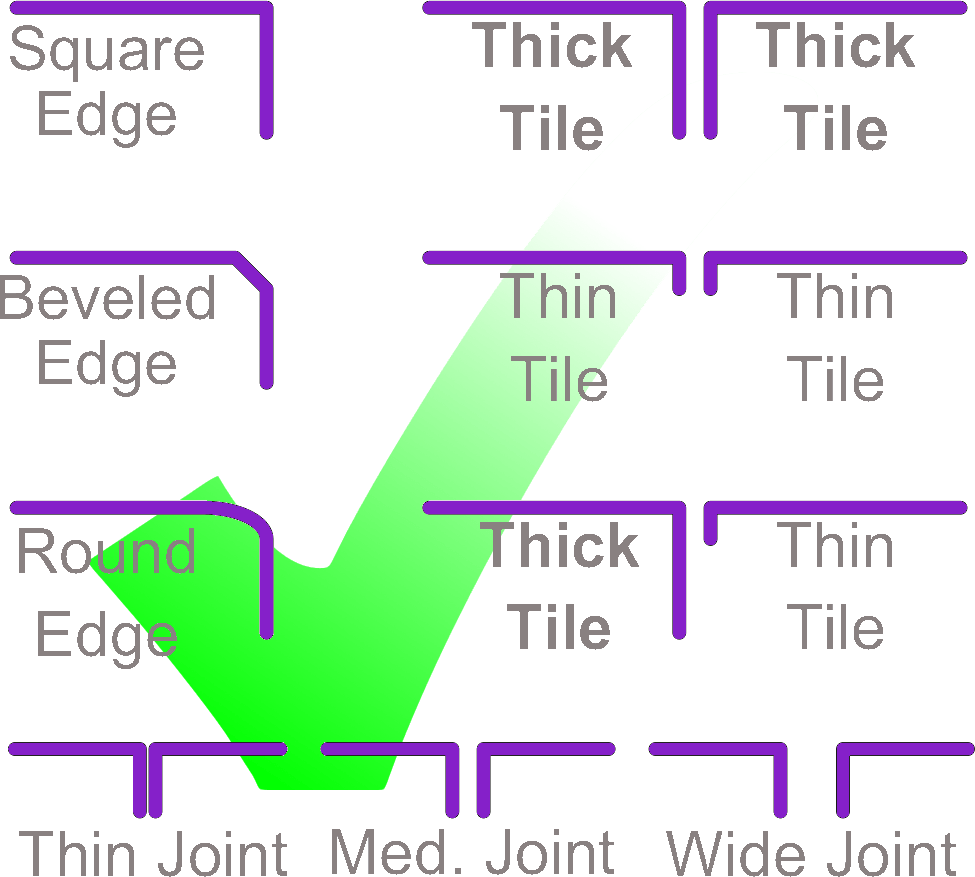
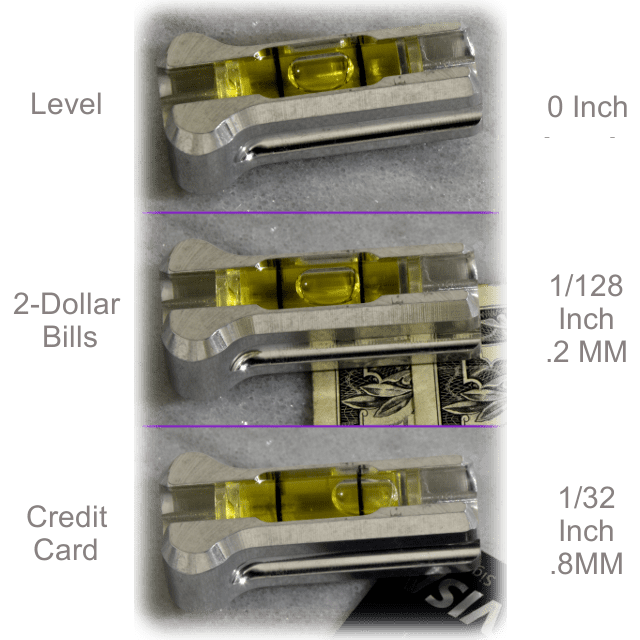
- The acceptable lippage will vary with tile edge profile and grout joint width.
•This method can be used with all tile laying patterns.
•By using 3 points of contact on the tile it will control the entire plane of the tile.![]() Caution! always work a tile downward, never lift a tile to achieve level. This would cause a void in the thin set. If tile is low before working it down you will need to add more thin set under tile. This can be achieved by thicker back buttering of tile or larger notched trowel.
Caution! always work a tile downward, never lift a tile to achieve level. This would cause a void in the thin set. If tile is low before working it down you will need to add more thin set under tile. This can be achieved by thicker back buttering of tile or larger notched trowel.